If you’re looking for a fun way to get into the Easter spirit, look no further than this delicious and charming Easter Bunny Cake. With just a few simple ingredients and steps, you can create an adorable cake that will delight both kids and adults alike. Follow this step-by-step guide to learn how to make your own bunny cake, complete with frosting and jelly bean decorations!
Why Make an Easter Bunny Cake?
Making an Easter Bunny Cake is a delightful way to get into the holiday spirit. Not only is it delicious, but it’s also incredibly fun and easy to make. Whether you’re looking for a festive addition to your Easter brunch, or hoping to surprise your family with something special, this cute cake is sure to impress. Plus, it can be customized in whatever way you’d like – from adding sprinkles or edible glitter for extra pizzazz, to using different colors of frosting and jelly beans for a truly unique look. With its versatility and creative potential, the Easter cake makes an excellent centerpiece that will add joy and sweetness to any gathering!
Not only is making this cake a fun and rewarding experience for you, but it’s also sure to bring a smile to your family’s faces! Now let’s get started – all you need to get going is some simple ingredients and lots of creative spirit!

Step One: Preparing the Cake Mix
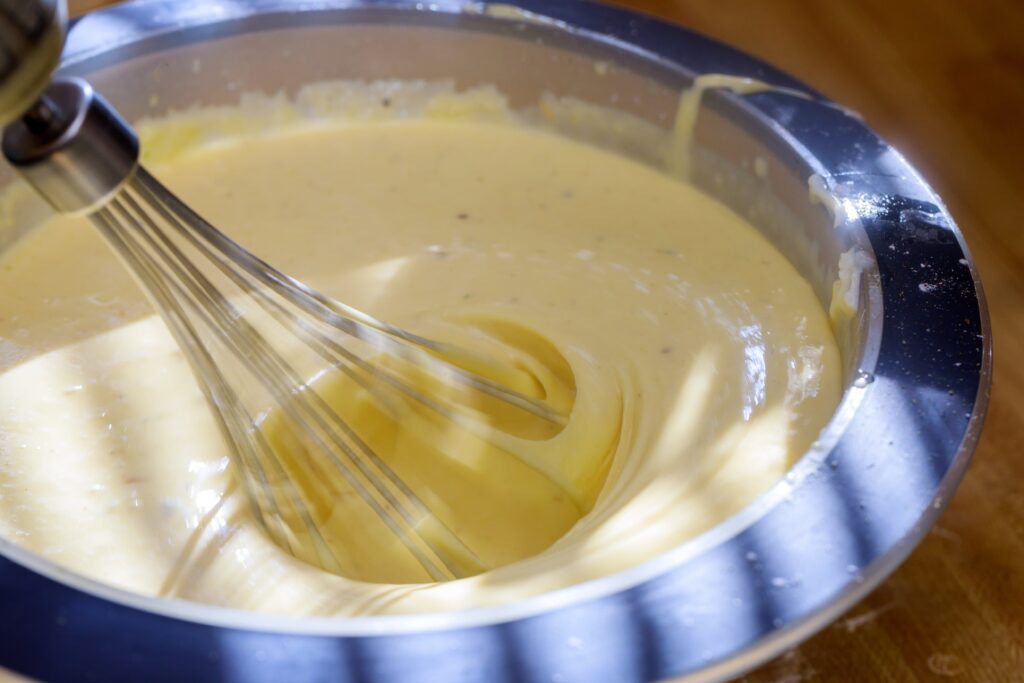
To begin, prepare the cake mix according to the instructions on the package. Preheat your oven to 350 degrees Fahrenheit. Grease two 8-inch round cake pans with vegetable oil and line the bottoms with parchment paper. Pour the cake mix evenly into both pans and bake in preheated oven for 25 minutes or until a toothpick inserted in center comes out clean. Allow cakes to cool completely before working on them further. Once cooled, use a serrated knife to level off any uneven tops of cakes so both have smooth surfaces. Place one of the cakes onto a large plate or platter and wrap it securely with plastic wrap; set aside for later use.
Now that the cake is ready, it’s time to move on to the next step: gathering ingredients and equipment for the frosting. Get ready, because it’s about to get even sweeter!
Gather Ingredients and Equipment
Before beginning your Easter Bunny Cake, you must gather all of the necessary ingredients and equipment. For the cake mix, you will need a white cake mix, vegetable oil, and two 8-inch round cake pans. For the frosting, you will need white frosting, pink frosting (or a combination of pink and white), powdered sugar, green food coloring, and pink food coloring.
Finally, for decorations you will need shredded coconut (or flaked coconut if that’s all that is available), black jelly beans for eyes, pink jelly beans for nose/mouth area, and additional jelly beans to make a tail on the back side of bunny. In terms of equipment needed to put it all together you will need an electric mixer with paddle attachment as well as a serrated knife. Once everything is gathered it’s time to start assembling your adorable Easter Bunny Cake!
Prepare the Cake Mix According to Instructions
Now that you have all the necessary ingredients and equipment, it’s time to prepare your cake mix. Begin by preheating your oven to 350 degrees F. Next, prepare your cake mix according to the instructions on the box, making sure to use a bowl large enough for both 8-inch round cake pans.
Once prepared, evenly divide the batter between the two pans and place them in the preheated oven. Bake for about 25 minutes or until a toothpick inserted into the center of each cake comes out clean. Once finished baking, allow both cakes to cool completely before moving on to assembling your Easter Bunny Cake.
Step Two: Making the Bunny Shape
Once the cakes have cooled, it’s time to assemble and shape them into an adorable Easter Bunny Cake. To begin, cover your work surface with parchment paper. Place one of the cakes on top of the parchment paper and use a serrated knife to cut the cake into two pieces. This will create a bunny head and ears shape. Use plastic wrap to protect both pieces from drying out then set aside for later.
Now, take the remaining cake and slice off a thin layer from one side using your serrated knife then discard that piece of cake. Cut this piece in half lengthwise and place each half along each side of the bunny head/ears shape you cut earlier. Gently press down on both halves and trim off any excess pieces until you have an even bunny shape all around. Finally, cover your entire creation with plastic wrap while you prepare your frosting and decorations.
Your Easter Bunny Cake is now assembled and ready to be decorated with frosting and other festive decorations! All that’s left to do is put your masterpiece in the oven and bake it until it’s golden brown. Now, let’s learn how to grease and line a springform pan so you can make this Easter treat again in the future!
Grease and Line a Springform Pan
Greasing and lining a springform pan is an important step in the process of making an Easter Bunny Cake. To begin, you’ll need to use either cooking spray or butter to grease the inside of the pan. This will help prevent the cake from sticking to the sides after it’s cooked, so make sure to spread it evenly. After greasing the pan, line it with parchment paper by cutting circles that are slightly larger than the size of your pan and pressing them into place. When you’re finished, take a moment to ensure that all areas of your springform pan have been adequately greased and lined before moving on to baking your Easter Bunny Cake!
Pour Half of the Batter into the Pan
Once you’ve greased and lined your springform pan, it’s time to pour half of your cake batter into the pan. To do this, measure out the ingredients listed in the Easter Bunny Cake recipe and combine them in a large bowl using an electric mixer with its paddle attachment. Once everything is blended together, pour half of the batter into the prepared springform pan and spread it evenly across the surface using a spatula. After that’s done, pop your cake into an oven preheated to 350 degrees Fahrenheit for around 30 minutes or until a toothpick inserted comes out clean from center. Finally, allow your cake to cool before proceeding with the rest of your bunny cake recipe!
Add Remaining Batter and Form Bunny Shape
Once the first half of your Easter Bunny Cake has cooled, it’s time to form your bunny shape by adding the remaining cake batter to the top. To do this, use a serrated knife to trim off any uneven edges or protrusions from the initial layer. Once that’s done, pour in the remaining cake batter and spread it out evenly using a spatula. Finally, using a spoon or your hands, mold the batter into a bunny shape with two ears on either side and an indentation for its head at the top. Bake your bunny shaped cake in the preheated oven for another 25-30 minutes before removing it to cool completely. Now you have a delicious Easter Bunny Cake ready for decorating!

Step Three: Decorating with Frosting and Jelly Beans
Once your Easter Bunny Cake has cooled completely, it’s time to decorate! Begin by preparing the frostings for the cake. To make a white frosting, combine 3 cups of powdered sugar, 1/3 cup vegetable oil, 2 teaspoons of vanilla extract and 1/4 cup of water in an electric mixer with a paddle attachment. Beat until smooth. For the pink frosting, add 1 teaspoon of green food coloring and 1 teaspoon of pink food coloring to the white frosting mixture before beating.
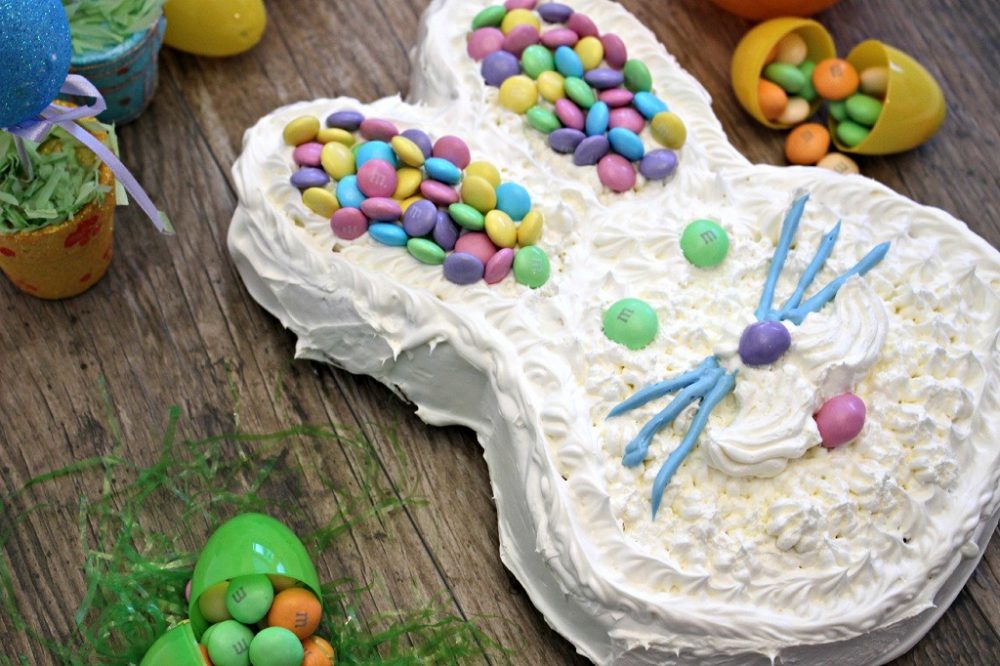
To assemble your bunny cake, first use a spoon or spatula to spread a thin layer of white frosting over the entire cake. Then use two spoons or a pastry bag to pipe on eyes, eyelashes and whiskers using the pink icing. Finally, press black jelly beans into the head for eyes and ears and place pink jelly beans around its head for decoration. Sprinkle the shredded coconut around its body for fur and flaked coconut around its ears for extra detail. Let your bunny cake cool before serving it up!
Your Easter Bunny Cake is now ready to be shared with family and friends! With its fluffy white frosting, bright jelly beans and coconut fur, this fun cake creation is sure to bring a smile to all who see it. Get ready for your next baking project – making the white frosting for the base layer of the cake!
Making the White Frosting for the Base Layer
Making the white frosting for the base layer of your Easter Bunny Cake requires only a few simple ingredients. Begin by combining 3 cups of powdered sugar, 1/3 cup vegetable oil, 2 teaspoons of vanilla extract and 1/4 cup of water in an electric mixer with a paddle attachment. Beat until smooth and creamy. Once you have your white frosting ready, use a spoon or spatula to spread it over the entire cake. Let it cool before adding any other decorations, like jelly beans and shredded coconut. With this easy step-by-step guide, you can easily create an adorable Easter Bunny Cake that’s sure to bring smiles to all who see it!
Preparing the Pink Frosting for Decoration
Preparing the pink frosting for decoration of your Easter Bunny Cake is a relatively simple task. Begin by combining 1 ½ cups of powdered sugar, 2 tablespoons of vegetable oil, 1 teaspoon of vanilla extract and 1-2 tablespoons of water in an electric mixer with a paddle attachment. Beat until smooth and creamy. Once you have your desired consistency, add a few drops of pink food coloring and mix until it’s evenly distributed throughout the frosting. You can then use a spoon or spatula to spread this pink frosting over the top and sides of your cake. This will give you the perfect foundation to start adding decorations such as jelly beans and shredded coconut to create an adorable Easter Bunny Cake that all your guests will love!
Applying White Frosting as Base Layer to Bunny Cake
Applying white frosting as a base layer is a critical step to making an Easter Bunny Cake. Begin by preheating your oven to 350 degrees and lightly greasing a 9×13 inch baking pan with butter or cooking spray. Next, prepare the cake according to the given recipe using a white cake mix and pour it into the prepared pan. Bake for 25-30 minutes or until a toothpick inserted in the center comes out clean. Once you have let the cake cool completely, use a serrated knife to cut it into two parts. Place one part aside for later and use the other half for creating your bunny’s head and ears. To make this easier, cover your work surface with parchment paper before applying white frosting over the entire surface of the cake. Make sure to spread it evenly with a spatula or pastry brush before adding any decorations such as jelly beans or coconut flakes for creating an adorable Easter Bunny Cake!
Applying Pink Frosting Details to Bunny Cake
Applying pink frosting details to your Easter Bunny Cake is an important step to making it look even more adorable and fun. Begin by preparing your pink frosting according to the cake recipe, and then use a paddle attachment with an electric mixer to mix for about two minutes. Afterward, add a few drops of green food coloring and mix until the desired shade is achieved.
Next, use a pastry brush or spatula to apply the pink frosting over the previously applied white frosting layer on your bunny cake. Make sure that you spread it evenly, so that all of the details come out nicely. Now sprinkle shredded coconut and flaked coconut over the entire cake in order to give it a fluffy texture. Finally, enhance its look further by adding some black jelly beans for eyes, pink jelly beans for nose and mouth, and two small bunny ears made from parchment paper and secured with vegetable oil. Let the cake cool completely before serving and enjoy!

Adding Green Food Coloring to White Frosting for Grass Detail
Adding green food coloring to white frosting is an important step in making your Easter Bunny Cake look more festive and fun. Begin by preparing the white frosting according to the recipe, and then use an electric mixer with a paddle attachment to mix until it’s smooth. Afterward, add a few drops of green food coloring and mix until the desired shade is achieved.
Once you have your colored frosting ready, use a pastry brush or spatula to apply it over the previously applied pink frosting layer on your bunny cake. Make sure that you spread it evenly, so that all of the details come out nicely. You can also enhance its look further by adding some shredded coconut and flaked coconut over the entire cake in order to give it a fluffy texture. Finally, use small pieces of plastic wrap or parchment paper to create grassy tufts around the bunny’s feet and ears for added detail. Let the cake cool completely before serving and enjoy!
Adding Jelly Beans for Colorful Decoration
Adding jelly beans to your Easter Bunny Cake is a great way to give it some colorful decoration. Begin by choosing the colors of jelly beans that you’d like to use for your cake. You can choose from classic colors such as black and white, or go with more festive options such as pink and purple. Once you’ve chosen the colors, you can use a serrated knife to cut each jelly bean into four pieces. This will make them easier to place on the bunny’s body and head, as well as around the edges of the cake itself.
Once all of your jelly beans are prepared, start by applying them onto the bunny’s head first. Then move onto its body and feet, making sure to evenly space out all of the pieces so that they look even and balanced when placed onto the cake. Finally, sprinkle some around the edges of the cake in order to add depth and a pop of color. Allow your bunny cake to cool before serving, and enjoy!
Finishing Touches: Coconut, Powdered Sugar, and Plastic Wrap
Finishing touches can make all the difference when it comes to making a beautiful Easter Bunny Cake. To add texture and flavor, coat the entire cake with shredded coconut. This will give the cake a nice crunch and provide a natural sweetness to your bunny’s fur. You can also use flaked coconut for added texture, if desired.
For more decorative effects, sprinkle some powdered sugar over the top of your bunny cake. The powdered sugar will help to make the jelly beans look even brighter against the white frosting background. Finally, cover your Easter Bunny Cake with plastic wrap before storing in the refrigerator or freezer. This will keep it safe from any outside contaminants until you are ready to serve it!
It’s easy to make an Easter Bunny Cake that looks and tastes great! With just a few finishing touches, this cake will be the talk of the town on Easter Sunday. Now let’s dive into the conclusion to see how you can ensure your bunny-inspired masterpiece is a smashing success!
Conclusion
In conclusion, making an Easter Bunny Cake is a fun and creative way to celebrate the holiday with your loved ones. By following the step-by-step guide, you can create a cute and delicious cake that will be the centerpiece of your Easter gathering. Remember to have fun with the decorations and add your own personal touch to the cake. Don’t be afraid to experiment with different colors and designs to make the cake truly your own. We hope you enjoy making this Easter Bunny Cake as much as we did and wish you a happy Easter!